Most Shopify stores run a single lead capture form. It usually looks something like this: a popup loads on the homepage offering 10% off, follows the visitor onto the product page, pops up again at checkout, then settles into the footer for anyone who clicked away the first three times. The merchant set it up a year ago, watched the email list grow modestly, and moved on to other things.
The math on why this doesn't perform as well as it could is really clear. Your Shopify store has very different people landing on it every day, and they need different things depending on where they are in their buying journey.
A returning customer typing your brand name into Google is not the same person as someone clicking through from a price-comparison ad onto a specific product page, who is not the same person as a shopper searching "does this run small" in an LLM before they complete their purchase.
Three different people, three different reasons to be there, three different things that would actually prompt them to email you. One Shopify lead capture form has to be vague enough not to distract any of them, which is the same as not converting any of them.
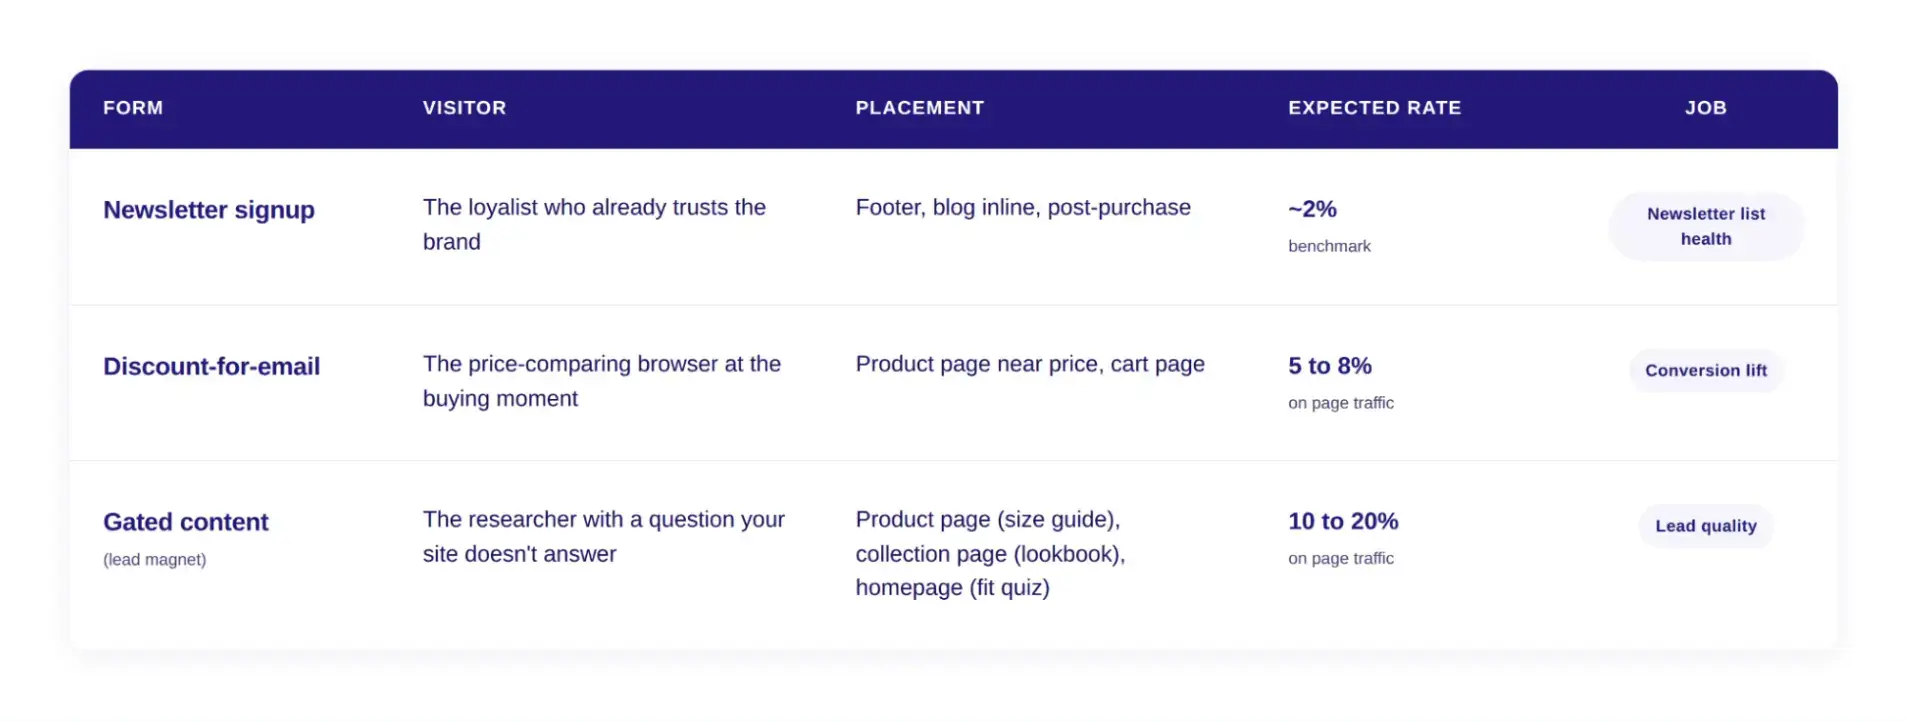
The Shopify stores building their email lists the fastest run a separate form for each of those visitors. A newsletter signup for the people who already trust the brand. A discount-for-email form for the price-comparing shopper at the buying moment. A gated content offer, a size guide, a fit quiz, and a lookbook for the researcher. Three forms, three surfaces, three jobs, no overlap.
Here's where each one goes, what conversion rate to actually expect, and how to install all three in an afternoon without writing a line of code.
What Lead Capture on Shopify Actually Means
A Shopify lead capture form is any opt-in form that turns an anonymous visitor to your store into a contactable one, usually by capturing an email address in exchange for something the visitor wants.
The reason most stores plateau on email list growth isn't the form they picked. It's that they picked one form and asked it to convert every visitor on the site.
The three form types that follow each do a job the other two can't.
Form 1. The newsletter signup form
The newsletter signup is the lead capture form most Shopify stores already have.
It converts the smallest share of visitors of any form in the system, and it is also the most valuable to keep running for your longer-term list-building strategy.
The newsletter lists compound over time. Discount forms convert higher today and decay. The newsletter form is your long game.
Who it is for
The loyalist who came back through a branded search. The blog reader who finished an article. Someone already familiar with your product who needs the form to stay out of their way, not pitch them on subscribing.
Where it lives
Three placements, in order of intent.
- Post-purchase thank-you page. The highest-intent moment a Shopify store has, and the most underused. The visitor just paid, so the opt-in is almost free. Setup varies by Shopify plan; Shopify Plus stores can embed directly on the checkout thank-you page.
- Blog inline. For stores that publish content and edit product images with care, the form sits inside or below the article the reader just finished, with copy that references what they just read.
- Footer. The sitewide passive net. The loyalist who is already convinced finds it where they expect to.
Expected conversion rate
Industry benchmark for newsletter signup forms sits around 2%, according to Klipfolio. Stores with a strong content engine and recognizable brand sit above that range. Stores without either sit below it.
Either way, the form is doing what it's built to do: convert a small share of already-convinced visitors. That isn't underperformance, it's correct scoping. The volume comes from the next two forms.
How to install
Decide first where the form lives.
Blog inline is the fastest install. Footer takes a few extra steps because of a Shopify constraint. Post-purchase has its own setup path depending on your Shopify plan.
Install POWR Form Builder from the Shopify App Store if you don't already run it. In the editor, click Create Form, search for the newsletter signup template, and pick one. Keep Name and Email fields, remove the rest.
Write title and button copy to match the placement: footer needs a low-friction ask ("Get our newsletter"), blog inline can reference what the reader just read ("More posts like this, every Friday"), post-purchase can lean on the transaction ("Stay in the loop on what drops next"). Click Save, then Publish.
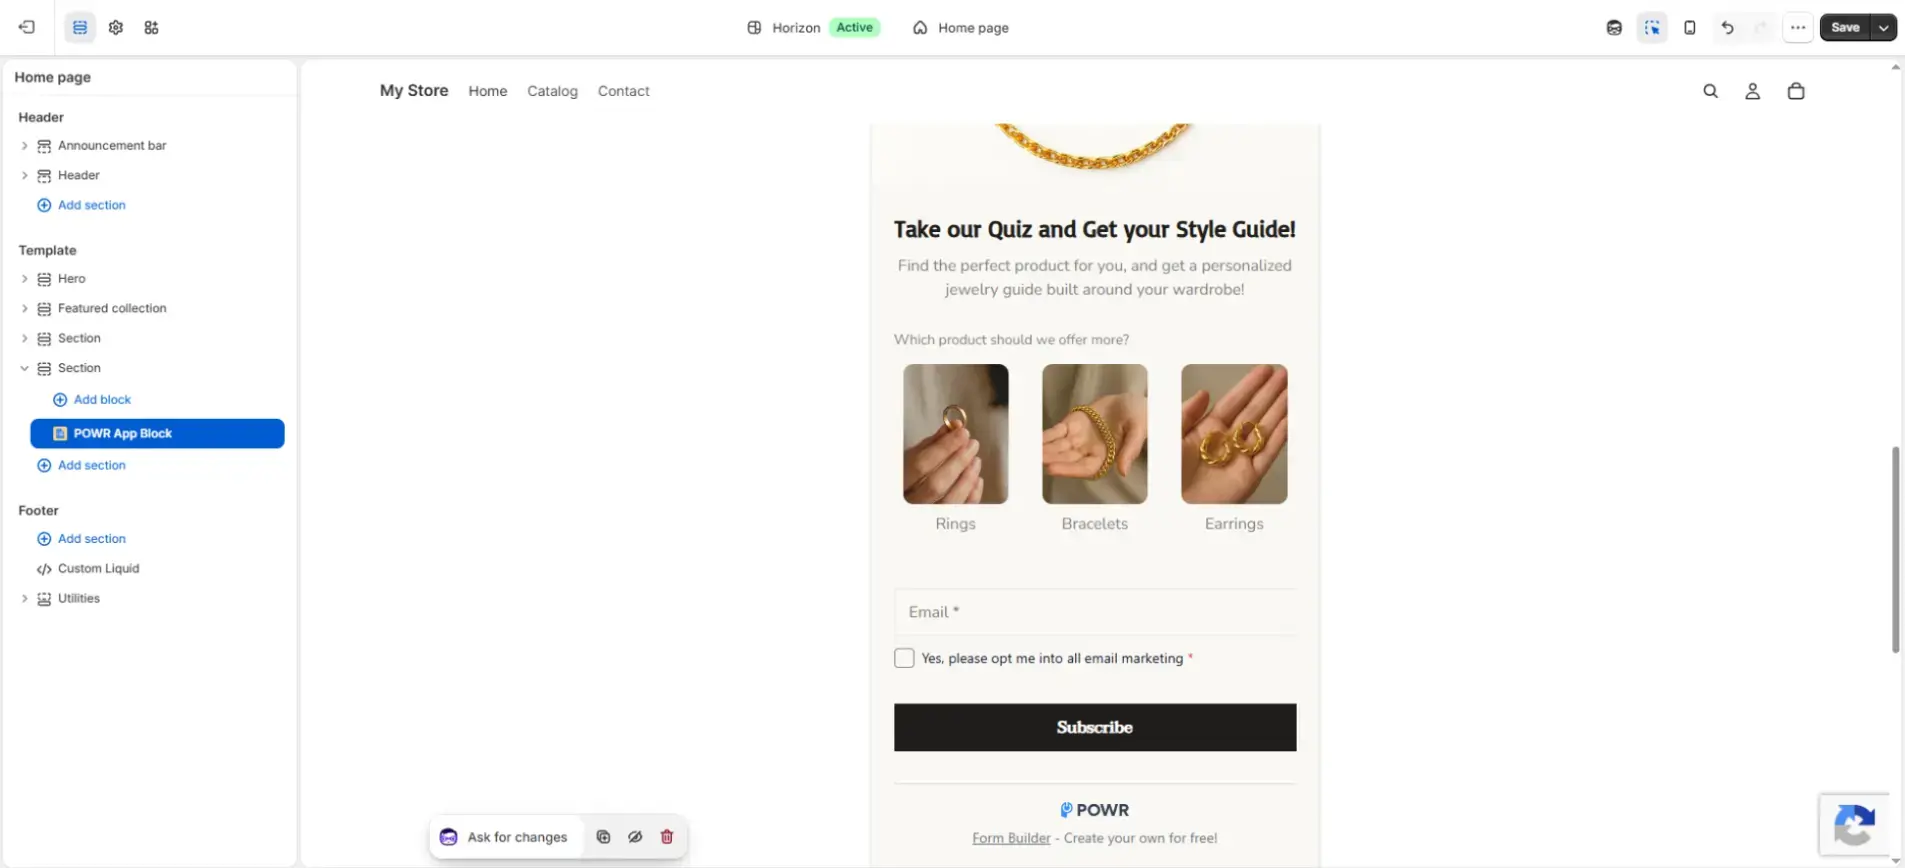
For blog inline placement: In the install screen, select All Blog Articles, copy the app ID, and click Install to Theme. In the theme editor, double-click the POWR App Block, paste the app ID, and save.
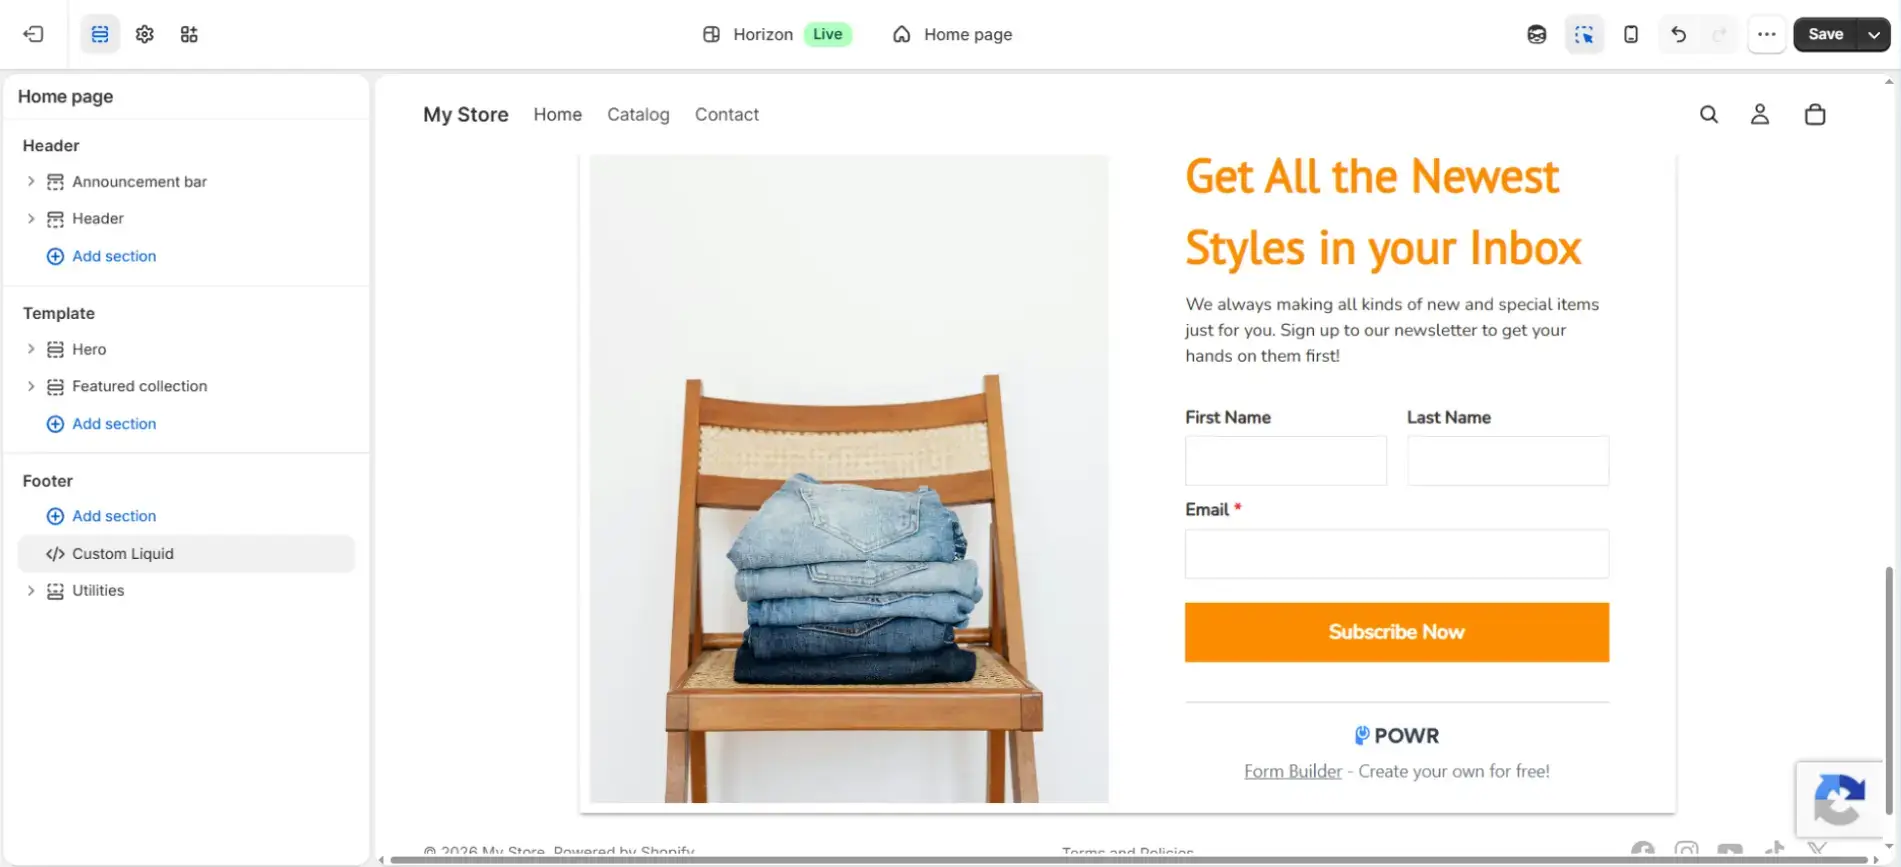
For footer placement: In the install screen, select Homepage and click Install to Theme. This is a routing step, not the final placement: Shopify needs a section selected to generate the install code. In the theme editor, delete the POWR App Block that landed on the homepage. Add a new section under Footer, choose Custom Liquid. Return to the install screen, click Install with Custom Liquid Code, copy the code, and paste it into the Liquid code field. Save.
For post-purchase placement. Shopify Plus stores can embed on the checkout thank-you page through Shopify's checkout extensibility. Non-Plus stores can use the order status page, accessible from POWR's install screen under Order Status.
Form 2. The discount-for-email form
When most merchants hear "discount form," they picture a popup. The popup is one version. The static placement version converts a different visitor at a different moment, and most stores need both.
The discount form sits on high-intent pages, near the buying decision rather than across it.
The visitor who's been on a product page for forty seconds, scrolling product images, weighing $90 against a similar item in another tab, is already looking for a reason to commit. A coupon-for-email offer in their line of sight at that moment converts on intent the form didn't have to manufacture.
Who it is for
The visitor on a product page comparing your price against a tab they have open with a competitor. They're past discovery, they're not yet committed, and a small reason to commit is enough to move them. This isn't the first-time browser the popup version targets or the loyalist who already subscribes to your newsletter.
Where it lives
Product page and cart page. On the product page, place the form near the price or above the add-to-cart button so it sits in the visitor's evaluation field. On the cart page, place it near the cart total.
Avoid the homepage and category pages. Homepage is too early in the funnel, and category pages catch visitors who haven't fixed on a product yet.
Effective email capture on Shopify happens close to the buying decision, which is why the placement options are narrow, and the install is straightforward.
Expected conversion rate
A discount popup running on total site traffic converts at 5–8% according to Wisepops.
A discount form on a product page converts at a lower headline rate, but it's measured against a different denominator.
The popup rate is the share of all visitors who saw it. The static form rate is the share of visitors who reached a product page in the first place, which is a smaller, higher-intent group.
Measured against the same denominator (visitors who reached a product page), the form often converts at a higher rate than a popup, catching the same visitors mid-browse. Same coupon, different moment.
How to install
The install is the easy part. The decision is whether you're embedding on the product page or the cart page.
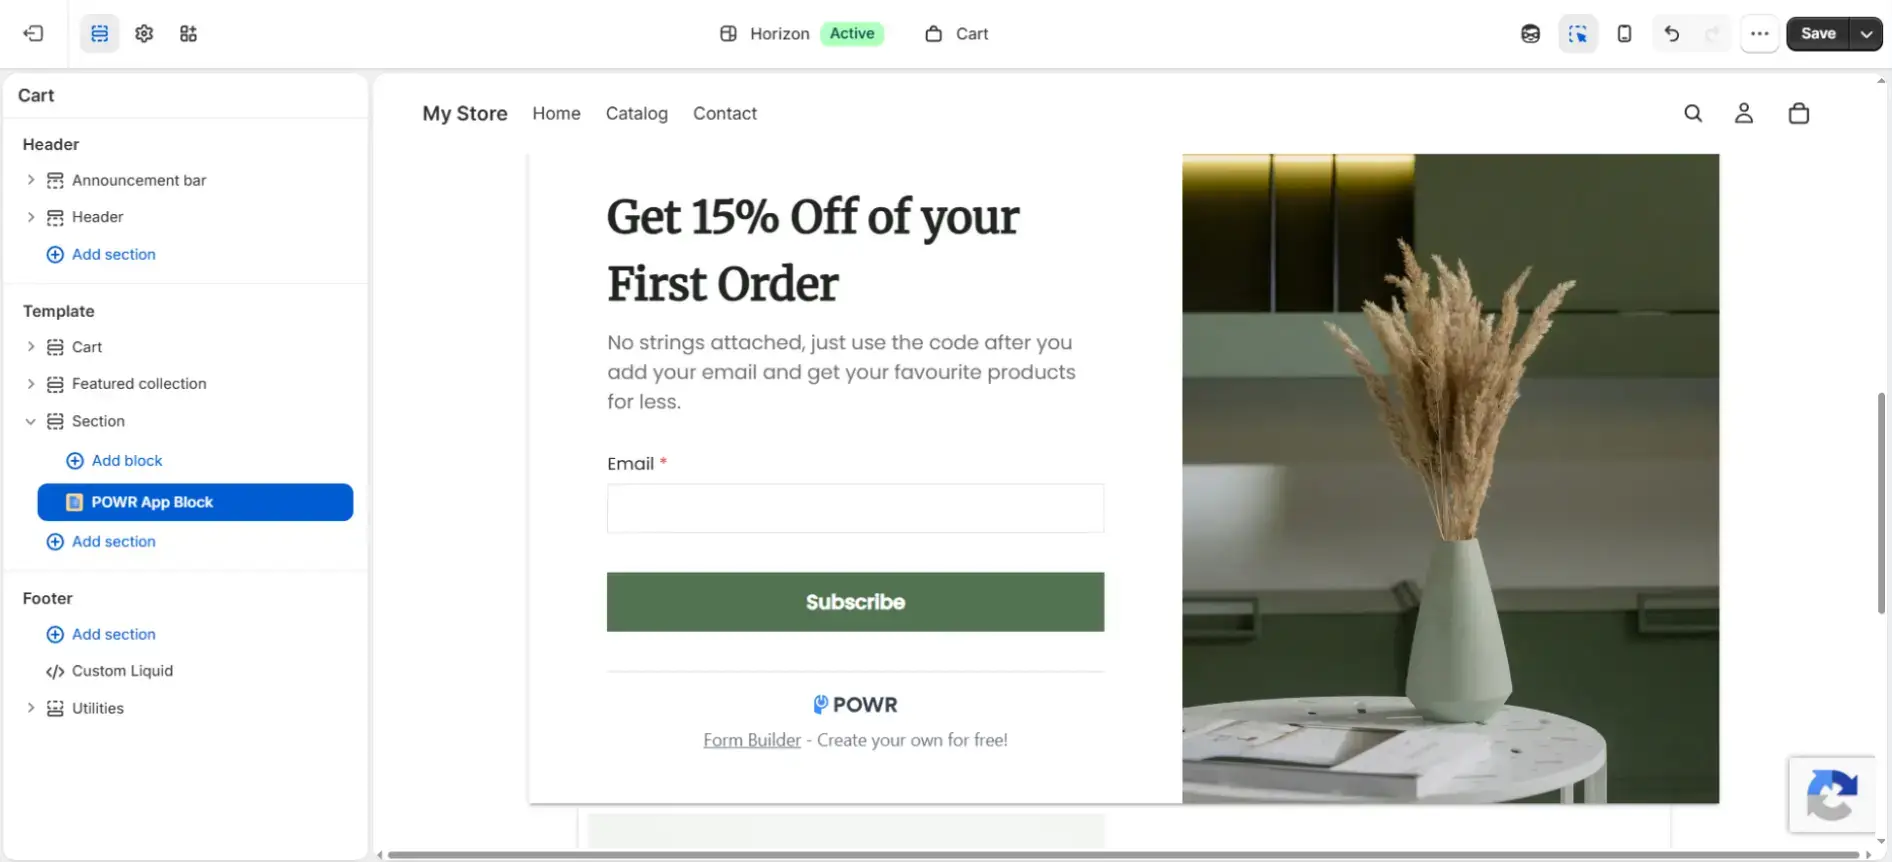
In POWR Form Builder, click Create Form, search for the discount signup template, and pick one. Customize the title and description with a specific offer ("10% off your first order" converts better than "Save on your first order"). Remove any fields beyond email.
Generate the discount code in Shopify Admin under Discounts before the next step. POWR Forms doesn't create codes; it delivers a code you've already made.
To deliver the code, go to After Submit → After Submission Options. The Success Message Text field displays the code on the page after submission. To deliver the code by email instead, connect the form to your email platform (Klaviyo, Mailchimp, or whichever you use) and set up the welcome email to include the code.
In the install screen, select All Products or Cart from the dropdown, copy the app ID, and click Install to Theme. Open the theme editor, double-click the POWR App Block, paste the app ID, and save.
Form 3. The gated content form (size guide, lookbook, fit quiz)
The gated content form is different from the first two in one structural way: the form itself is the smaller part of the work.
The asset behind the form (a size guide, a lookbook, a fit quiz) is what determines whether visitors submit, and building that asset is a real piece of work.
Most stores never build a gated content form because they see the asset as a content project, not a lead capture project. The stores that do build it get the highest-quality leads in the system.
The visitors who submit are the ones who need the asset to make a purchase decision, which is why this form converts at the highest rate in the system.
Who it is for
The researcher with a specific question that your site doesn't answer easily. Does this run small? Will the inseam work for my height?
In beauty, it's shade match or ingredient compatibility against a known sensitivity. This visitor isn't browsing; they're investigating, and the investigation is blocking the purchase.
Where it lives
Each asset has a natural surface.
A size guide goes on the product page, near the size selector, where the question is being asked. A lookbook fits on the collection page, where the visitor is choosing between products, and styling cues are part of the decision. A fit quiz works as a homepage tile or on the category page, because the quiz itself replaces the category browsing the visitor would otherwise do.
Expected conversion rate
Gated content forms in apparel and beauty regularly convert at 10–20%, per OptinMonster's benchmarks. That rate measures visitors who reached the offer page, not total site traffic.
On a 10,000-visitor store where 800 visitors reach the size guide page, 15% submit, which is 120 emails. Fewer total leads than the discount-for-email form, higher rate against the page that actually serves them.
The lead also comes with context. A size guide submission means the visitor had a sizing question. With a fit quiz, you have their stated preferences right in the form fields.
Neither of the other forms tells you that, which is why gated content is the form you'd actually segment on downstream.
How to install
Before any install steps: prepare the asset and host it somewhere with a public URL. POWR Forms doesn't deliver files directly, so the asset needs to live somewhere the visitor can reach.
Shopify file storage works (Settings → Files, upload, copy the file URL), as does Google Drive, with link sharing set to anyone with the link.
For a fit quiz, the prep is different. The questions and answer logic live inside the form itself, so what you're preparing is a list of questions and where each answer routes the visitor.
POWR Forms doesn't have a gated content template, so the form gets built from scratch. The build is short for size guides and lookbooks, longer for quizzes.
For a size guide or lookbook, click Create Form and start from a blank form.
Add a single email field. In After Submit → After Submission Options, you have three delivery paths: paste the asset URL into the Success Message Text field, set up a follow-up email through your connected email platform, or use Redirect to another page to send the visitor straight to the asset URL after submission.
The redirect option is the smoothest experience for the visitor; it requires POWR Forms' Starter plan or higher. Save and Publish.
For a fit quiz, use the multi-step template (the closest starting point POWR Forms offers) and configure each question as its own step. The answer options route visitors to the next question or to a final destination (a product collection URL, a download URL, or both). The install pattern is the same as any Shopify opt-in form, with the quiz logic as the one extra layer. Save and Publish.
In the install screen, select the section that matches the placement: All Products for a size guide, All Collections Pages for a lookbook, Homepage or All Collection Pages for a fit quiz. Copy the app ID, click Install to Theme, double-click the POWR App Block, paste the app ID, and save.
How to Run All Three Forms Together
Three forms sounds like three times the work. Built from POWR templates, all three take less than an afternoon to set up. The work isn't tripled, it's distributed.
It also sounds like three prompts the visitor has to dismiss. It isn't. Each form runs on a different surface to a different visitor.
The system at a glance
What the system produces that one form can't
Each form is an opt-in into a different flow, but they feed the same email list. In your email marketing system, that means three welcome sequences triggered by form-of-origin tags:
Newsletter sign-ups enter a brand introduction sequence. Discount sign-ups receive the code, a reminder before it expires, and a soft cross-sell. Gated content sign-ups receive the asset, then a behavioral nurture sequence based on what they were researching.
A visitor who opts in to two forms gets deduplicated at the ESP, tagged with both origins, and stays in the flow they entered first.
This is the operational piece most stores skip, and it is the piece that turns three forms into a system rather than three competing prompts.
Where to start if you're building from zero
The order matters. The discount-for-email form pays back fastest because the volume of product-page traffic is large and the conversion is immediate. Build it first.
The gated content form takes longer because the asset (the size guide, the lookbook, the fit quiz) is the real piece of work. Build it second, while the first form is already collecting.
The newsletter form is the lowest-effort install and the longest-payback asset on the list. Build it last, because it doesn't compete with the other two for setup time.
How the forms don't step on each other
The discount form lives near the product price. The size guide lives near the size selector. The newsletter form sits in the footer as a passive net, not an active prompt. Three forms, three pieces of real estate, no overlap.
The system, not the form
The system is the strategy. The forms are the components. Most stores skip the system because the form feels like the work, and one form is easier to ship than three.
The stores that build all three end up with a list that grows from three different surfaces in parallel, with each form catching the visitor that the other two would have missed.
Run one form, you optimize for the average. Run three, you stop having to.
FAQ
What is lead capture in Shopify?
Lead capture in Shopify is anything that turns an anonymous store visitor into a contactable one, usually an email address. The form is the visible part. The system around it (which forms run on which surfaces, who they catch, and how they avoid stepping on each other) is what determines whether the email list actually grows.
How do I capture leads on Shopify?
The short answer is three forms, not one. A newsletter signup in the footer for visitors who already know the brand. A static discount-for-email form on product and cart pages for the price-comparing visitor at the buying moment. A gated content form on the relevant page for the researcher who needs more information before they can buy. Each form catches a different visitor at a different point in the decision, and they don't overlap because they live on different surfaces.
What is the best lead capture form for Shopify?
There isn't one. The form that grows your list the most is the discount-for-email form on product pages, because the visitor pool is large and the offer is immediate. The form that brings the highest-quality leads is the gated content form, because the submission tells you what the visitor was researching. The form that quietly does its job over the years is the footer newsletter signup, because it converts visitors who already trust the brand. The stores compounding their lists run all three.
How do I add an email signup form to Shopify?
The fastest path is an app like POWR Forms, which handles templates, styling, and placement without theme code. Install the app from the Shopify App Store, build the form in the editor, and embed it on the section that matches your placement (footer, product page, blog inline). For most stores, this takes under ten minutes per form. The slower paths are hardcoding into the theme through the customizer (limited styling, no logic) or using Shopify's built-in customer signup (basic, no popups, no gated content). App-based is the standard approach for any store that wants to iterate on form design over time.
Build your first Shopify lead capture form with POWR today.