Your product looks great in person, but on your online store? Not so much. Blurry shots, weird lighting, and dull angles can turn people off before they even click “add to cart.”
But do not worry. In this article, we will explore how DIY product photography helps you improve image quality and upgrade your brand without hiring a pro. We will also share the best practices you can apply.
By the end of your read, you will be ready to let your photos do the selling with scroll-stopping product photography that can differentiate your brand.
Article Shortcuts:
- Why DIY Product Photography Matters
- DIY Product Photography Equipment Checklist: Snap Like A Pro
- DIY Product Photography Best Practices
- Frequently Asked Questions about DIY Product Photography
Snap Like A Pro: Your DIY Product Photography Starter Kit
Check off what you already have and jot down what to add. Each piece brings your product images closer to professional quality.
|
What You Need |
Cost Range |
Ease Of Use |
|
Camera/smartphone |
$0-$500 |
Easy |
|
Lighting (window light/basic lights) |
$0-$75 |
Easy |
|
Background materials |
$5-$30 |
Very easy |
|
Basic tripod |
$15-$50 |
Very easy |
|
Editing software/apps |
Free-$20/month |
Moderate |
If you see $0, good news: You likely already own it. Want to level up? That is where the cost kicks in, depending on how fancy you want to get.
Why DIY Product Photography Matters
Read through each perk and highlight the ones that matter most to your business. Use them to decide if taking your own product shots is the right move for you.
A. Higher Conversion Rates from Better Images
About 83% of shoppers say how a product looks online sways their buying decision. So yes, your photos matter a lot.
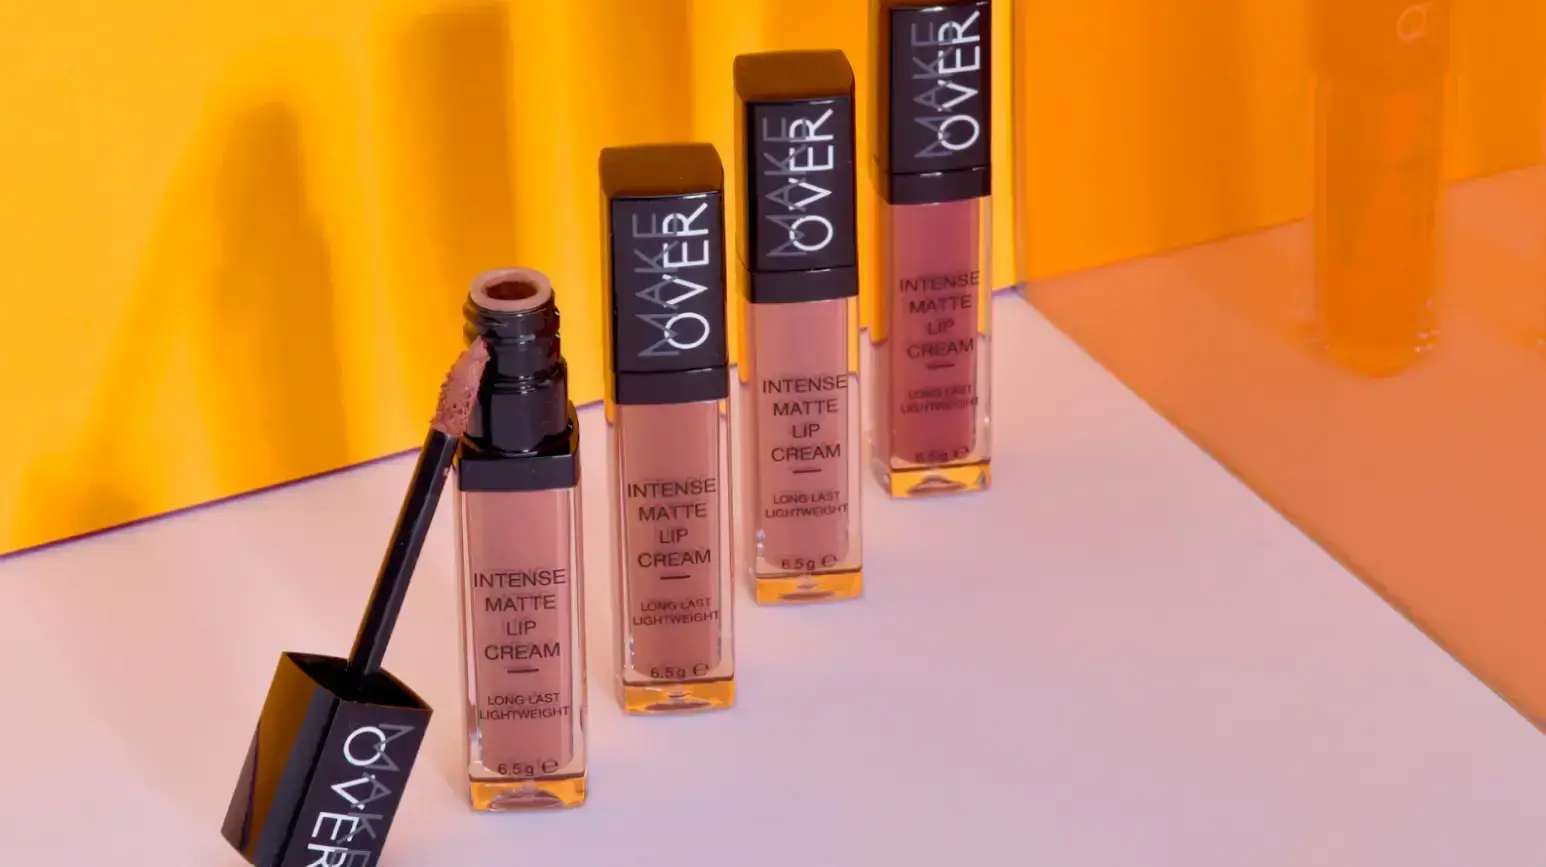
With DIY product photography, you’re not stuck with stiff, generic shots. You get to show off real textures, angles, and close-ups that answer the exact questions your buyers ask.
That personal touch builds trust fast and helps your brand stand out in the market. Want to show how your product fits in someone’s hand? Do it. Need to update photos mid-launch? Easy.
When you create your own stunning product photos, you control the story, so your eCommerce store stands out in the market. Then, use that visual story to turn casual browsers into happy buyers.
B. Shoot In Bulk and Save Money
Unlike product shots done by a product photography studio, DIY lets you shoot as much as you need without the extra costs piling up. No hourly rates, no per-image fees, and no reshoot charges. Just grab your gear and go.
You can knock out a month’s worth of product photos in one afternoon: Different angles, lifestyle shots, close-ups, even seasonal versions.
This bulk approach helps you unlock serious content marketing power because you get more images for your website, socials, emails, and ads without chasing invoices or waiting on edits.
With this, you stay in control, move faster, and stretch your budget further.
C. Develop a Recognizable Visual Style
When you hand everything off to a studio, your photos might look clean, but they also look like everyone else’s. Meanwhile, going DIY lets you experiment, tweak, and shoot in your own way until something clicks.
Additionally, you have the opportunity to experiment with colors, angles, lighting, and props that accurately reflect your brand’s vibe. Over time, your style becomes recognizable, and that is gold when people are shopping online and scrolling fast.
You can work with a brand identity designer to further stand out and stay consistent. With their guidance, your product photos can reinforce your visual identity across every channel and become a powerful extension of your brand, not just standalone images.
DIY Product Photography Equipment Checklist: Snap Like A Pro
Follow along and build your product photography setup as you read. Grab your gear, clear a space, and test each step to see what works.
Step 1: Choose The Right Lighting Location
You do not need to rent a fancy studio for pros; you just need the right corner of your space.
The location you choose can either make your product glow or leave it looking flat and unappealing. Even with the best gear, bad light kills quality.
That is why great professional product photography starts with choosing a spot that gives you clean, soft, and consistent natural light.
-
What To Do
Look for a north-facing window because it will give you consistent natural sunlight without harsh shadows. Stand near every window in your space and watch how the natural sunlight falls. Look for soft shadows and even light, like this:
Another way to pick the right spot is to snap test photos in different corners at different times. Then, let the best light guide your choice. Make sure to avoid any spot where light hits too hard because direct sunlight creates harsh shadows.
You can also walk around with a white object (like a mug) to see how the light wraps around it. This helps you see where you can get a great bounce. Use the area with the fewest competing light sources to avoid weird color tones from mixed photo studio lighting.
Lastly, once you have your spot, clean the window glass because streaks and grime scatter light and dull your images fast.
To do this right, hire a professional window-washing service to make sure every corner is spotless. That way, when you are ready to shoot, you will not waste time fixing poor lighting or reshooting because of haze or glare.
Step 2: Set Up a Clean Photography Background
A clean background tells your customer exactly where to look. No distractions. No visual clutter. Just your product, front and center.
Also, it helps your white balance stay accurate and gives you more control over shadows, reflections, and contrast. This is a huge deal when you want your shots to look sharp and professional without editing for hours.
-
What To Do
- Try seamless paper rolls if you want a curve with no visible edges.
- Use a foam board as both background and base to reflect softer light evenly.
- With clothing, hang pieces against a white background or shoot flat lays on a wrinkle-free sheet.
- Use a poster board. A white or light gray background works best for most products.
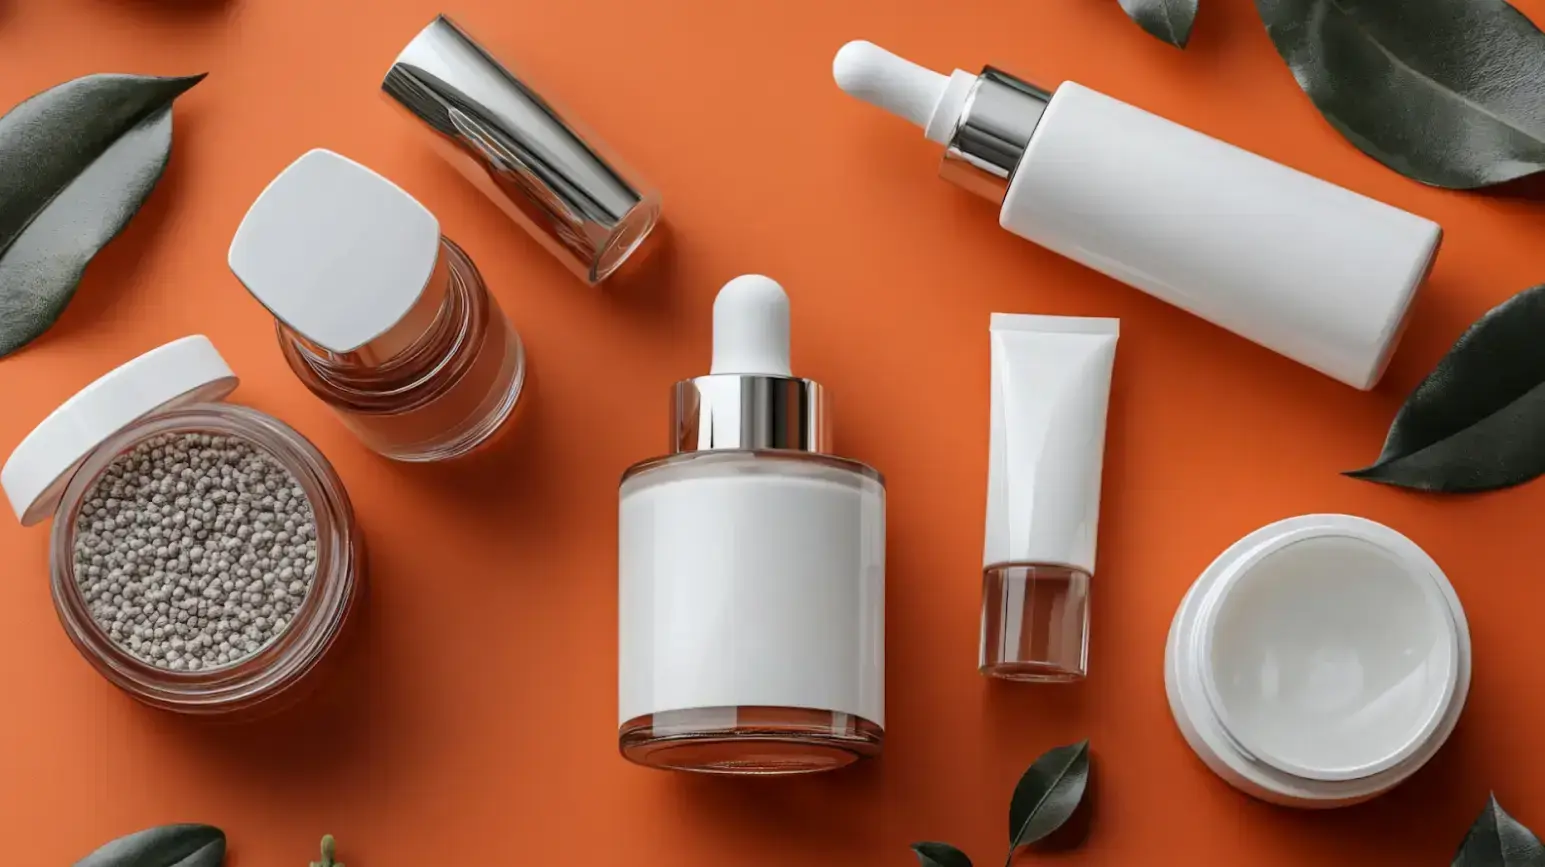
- For food shots, try wood, marble, or textured backdrops that feel real but are not busy.
- For lifestyle photos, keep it simple. Add 1–2 props that support the story but do not steal the spotlight.
- Use a light tent for smaller items like jewelry to remove harsh shadows and wrap the product in clean light.
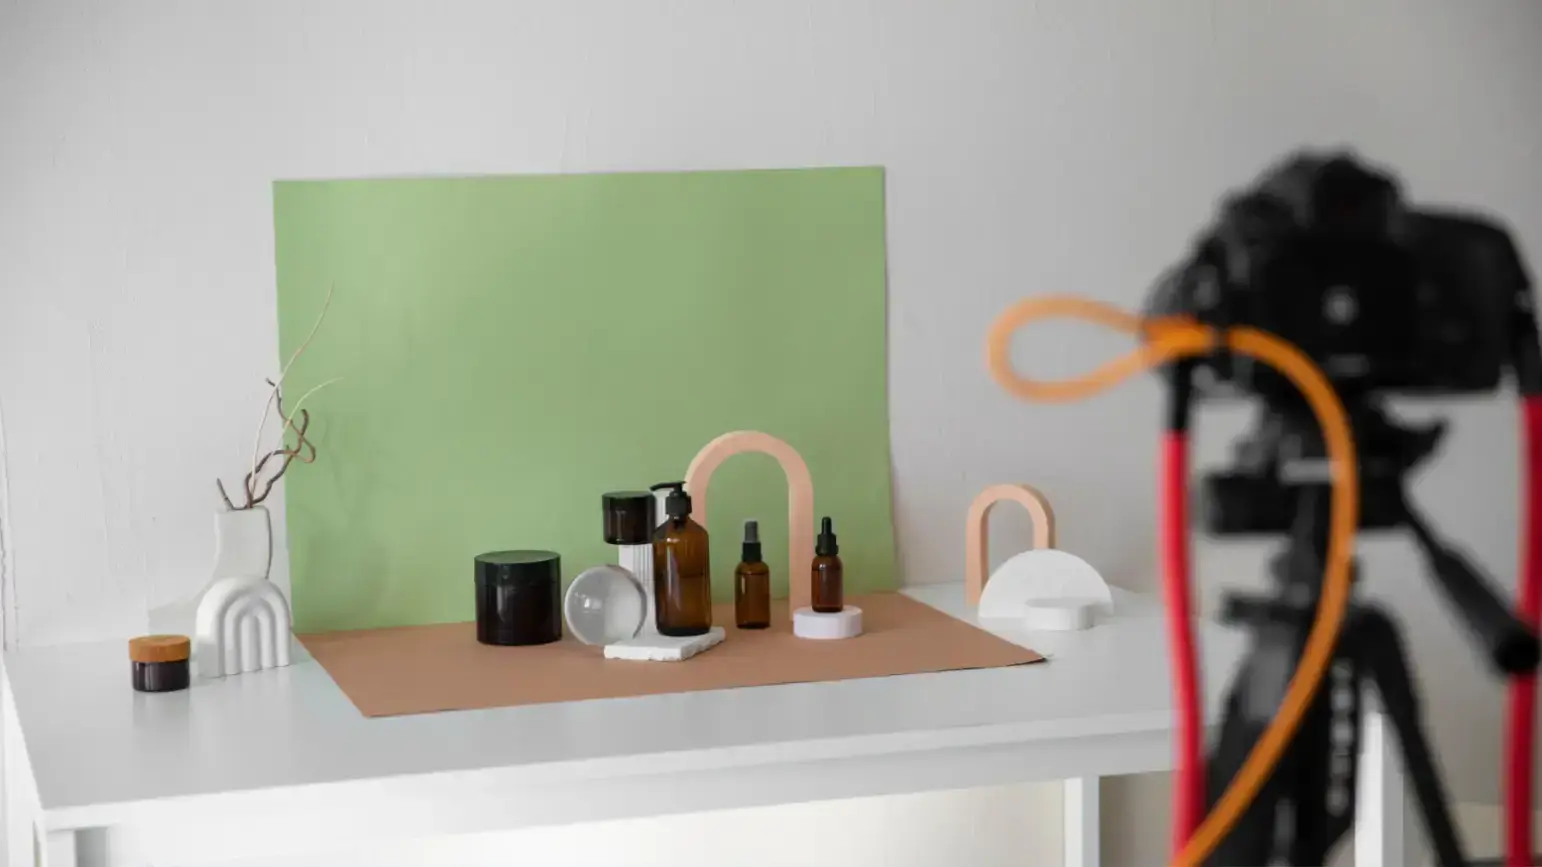
Here’s an example background setup:

Step 3: Control Lighting for Sharp Product Images
Shoppers cannot touch your product, so how it catches the light becomes the next best thing. The surface? The shadow that shows depth? It all signals quality.
When you control light well, you create professional product photos that make your product feel real, tangible, and worth buying; no filters or fake edits are needed.
-
What To Do
- Avoid direct sunlight and use sheer curtains to diffuse light for an even glow.
- Add artificial light (like LED desk lamps with daylight bulbs) when natural light is not enough.
- Download a free light meter app to check if your product is properly exposed before you shoot.
- Place your product on a rotating base so you can adjust angles without moving your lights.
- Use white foam boards or reflectors to bounce light back onto your product and soften shadows.
- Create a simple fill light using a second light source opposite your main one to reduce harsh contrast.
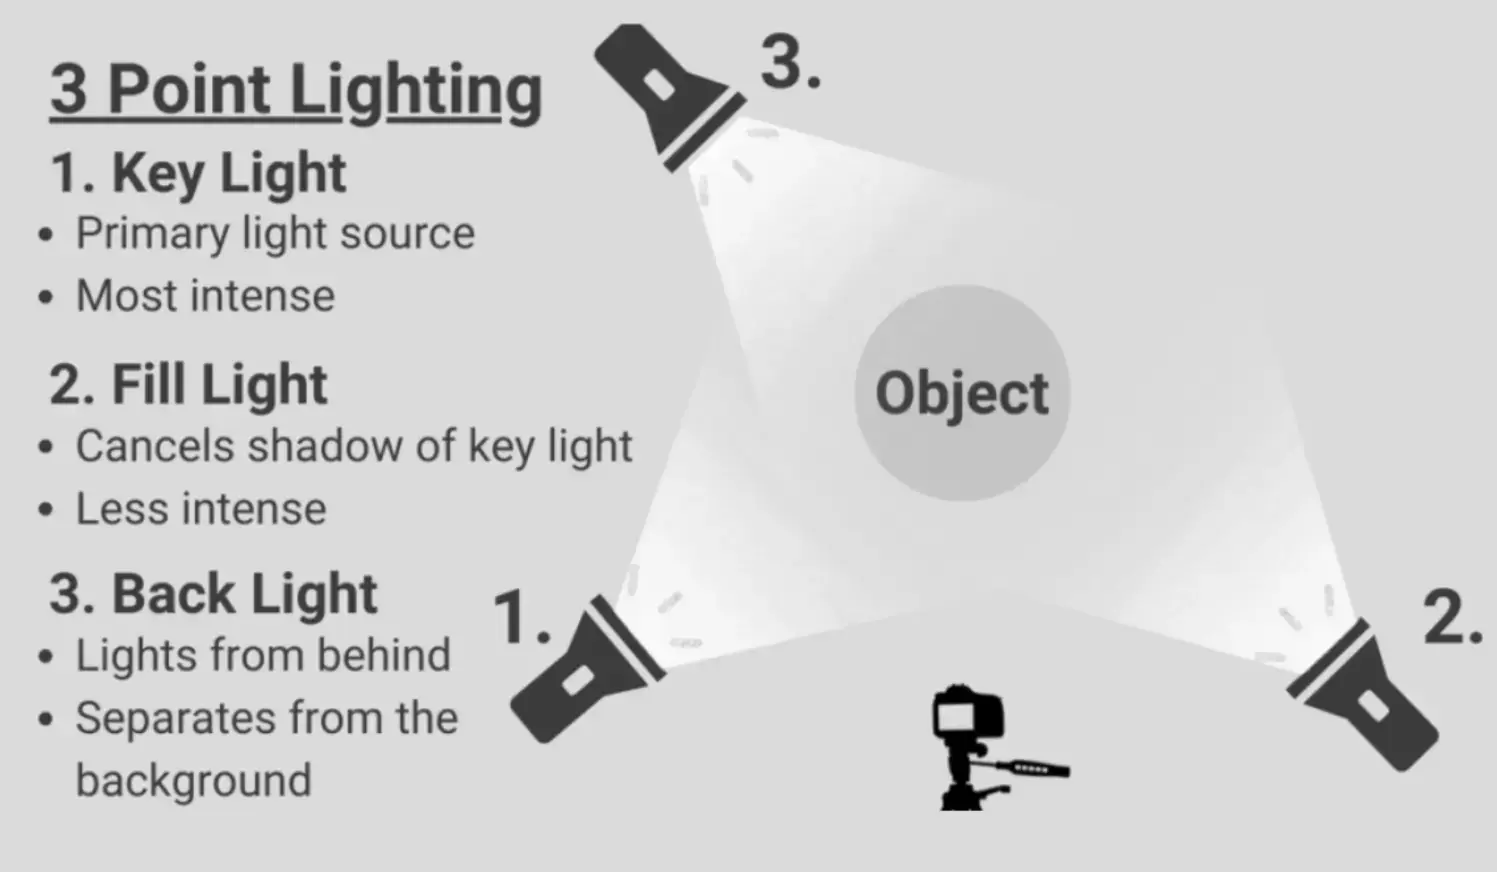
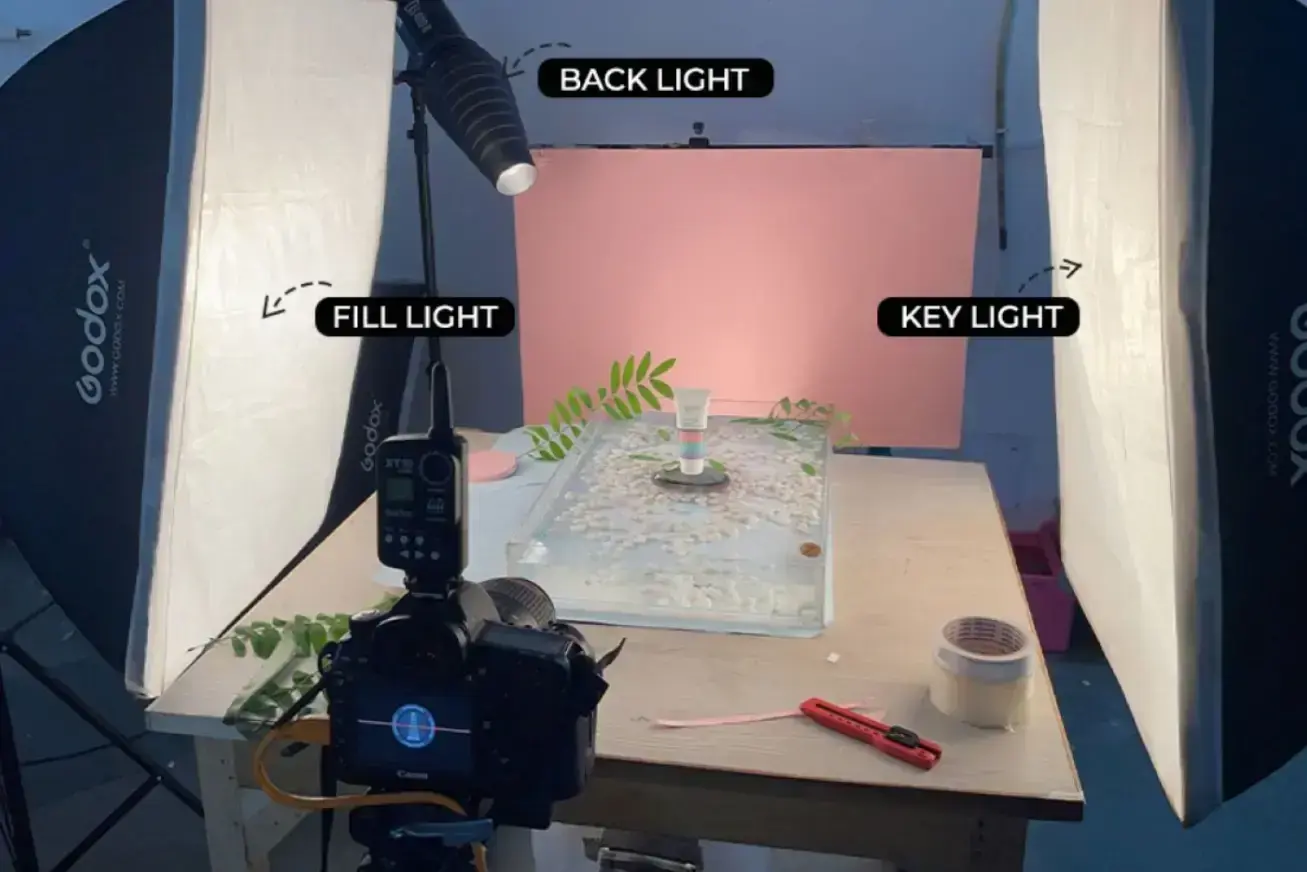
Here’s what a real lighting setup looks like, and you can easily swap in smaller lights if you are working with limited space or budget for light rental:
Step 4: Position Products for Professional Results
Where and how you place your product can either pull people in…or confuse them.
It is not just about centering it in the frame. The way your product sits in the scene affects how buyers read its size, shape, and texture. Clean positioning helps you tell a clear visual story that builds trust and supports smarter purchasing decisions.
-
What To Do
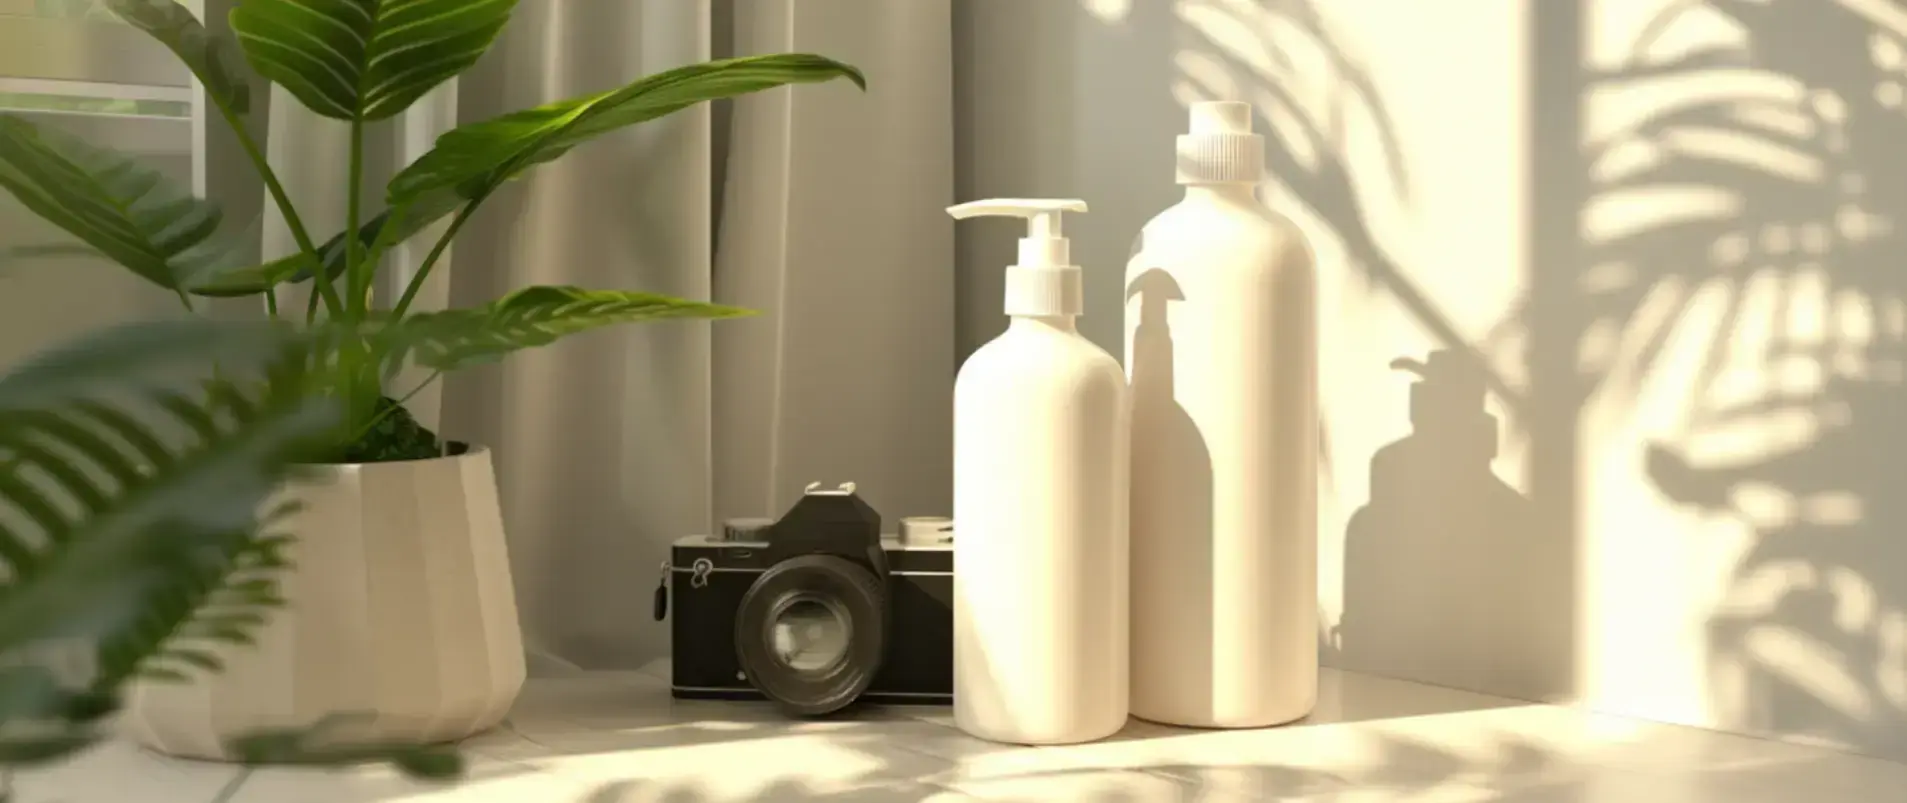
Start with a flat, stable surface to avoid tilted or uneven shots. Place the product at the center of your setup, then shift it slightly based on the angle or style you want, like this:
For flat lays, lay the product neatly and keep spacing even for clean, professional-looking images. Here’s an example:
Shoot from multiple angles, too:
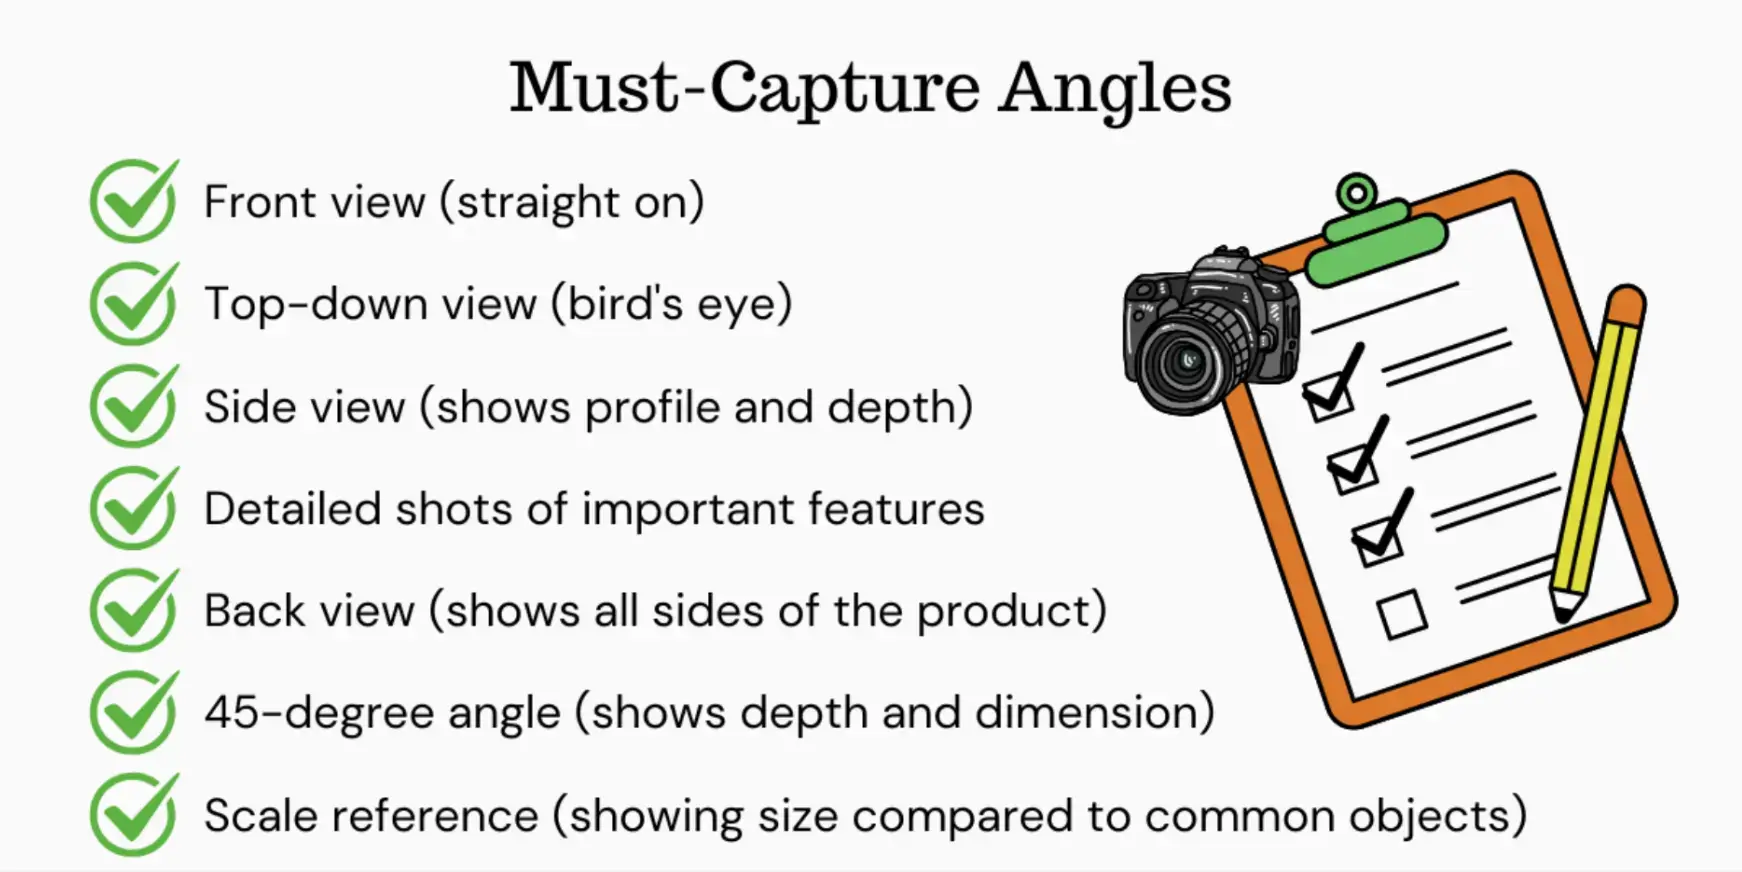
Here are more ways to get your ideal product shot:
-
- Use tape or tacky putty to keep smaller items from rolling or moving.
- Align product labels or logos so they face the camera clearly and cleanly.
- If your product stands up, leave a bit of space around it in the frame. It makes it feel more polished and easier to crop for different platforms.
Step 5: Adjust Camera Settings Like a Pro
The right camera settings help you avoid blur, weird lighting, or dull details that can make your product look cheap. When you dial in the right exposure settings, you capture clear, sharp images that look pro, even on your phone.
-
What To Do
For Smartphones:
-
- Clean your lens to avoid haze or blur from smudges.
- Skip digital zoom. Move closer instead for sharper detail.
- Tap to focus on the most important detail of your product.
- Use the back camera, not the selfie one, because it has better quality.
- Turn on the grid lines to help center your shot and straighten the edges.
- Use AE/AF lock (tap and hold) to keep your focus and brightness steady.
If you are using a DSLR or digital camera, do these:
-
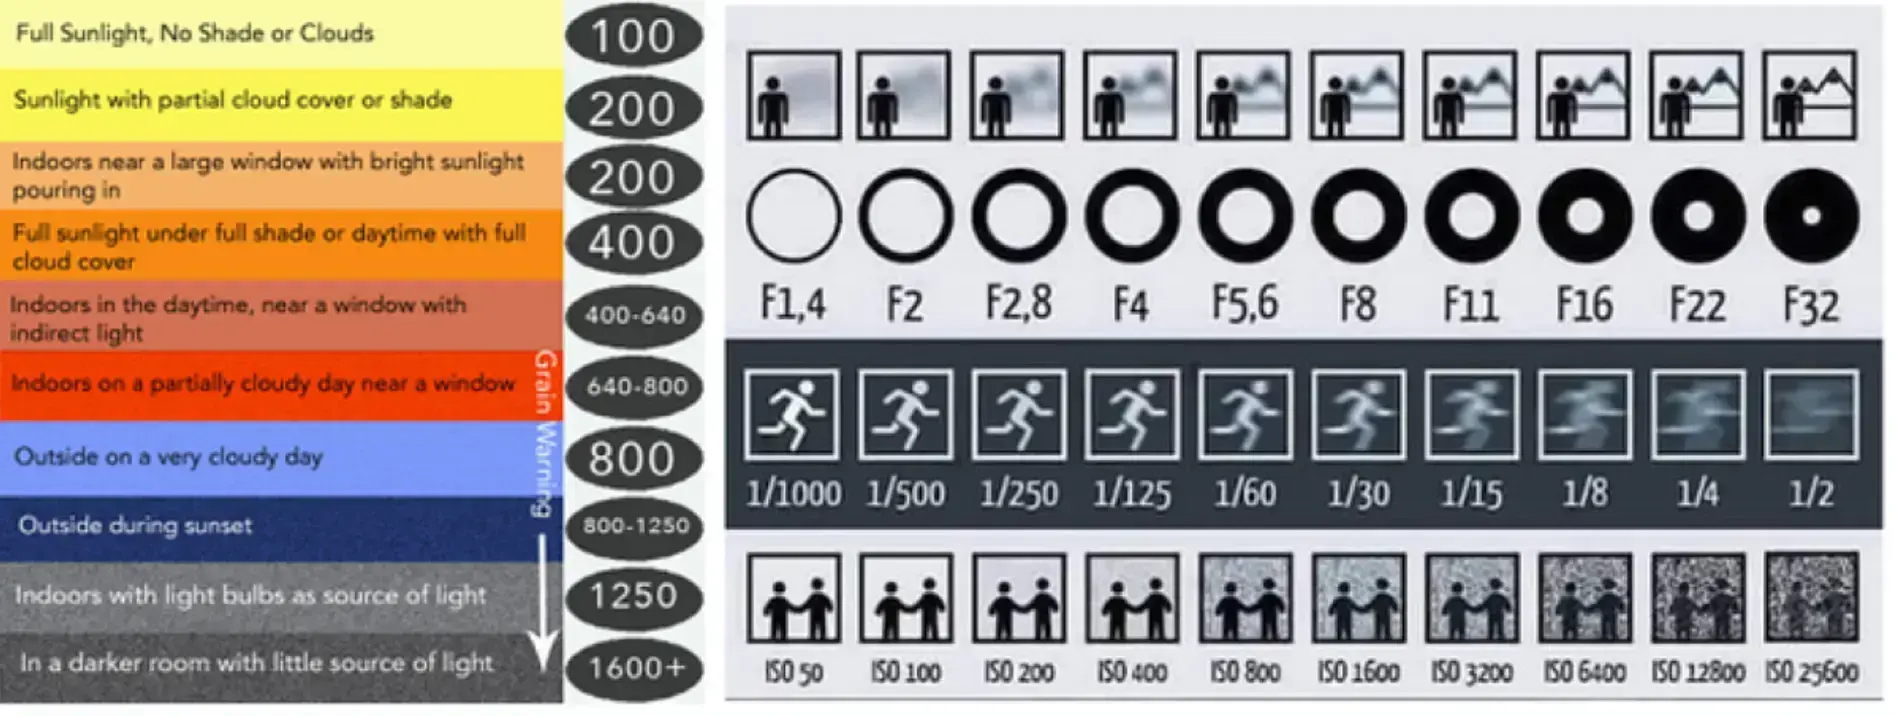
- Keep ISO at 100–400 to avoid grain.
- Set the aperture to f/8–f/11 for full product clarity.
- Use Aperture Priority mode (A/Av) for more control.
- Adjust the shutter speed only if motion blur becomes an issue.
- Use a 2-second timer to prevent shaking from pressing the button.
- Match your white balance to your lighting; auto often works well.
To make this even easier, search YouTube for tutorials specific to your camera model. You will find plenty of free, step-by-step videos. But to jumpstart your learning process, here’s a quick overview of camera settings:
Step 6: Edit Product Photos for Consistency
Even with perfect lighting and sharp focus, your photo is not finished until you clean it up. But editing is not about enhancing your photo so much that it starts to look fake.
Make sure your product looks the same on-screen as it does in real life. Color distortion not only hurts your brand’s credibility but can also lead to returns if buyers feel misled.
Since over a quarter of U.S. adults have some form of vision impairment, clean contrast, legibility, and visual clarity are even more critical. Well-edited, sharp product images help every shopper feel confident in what they are seeing.
-
What To Do
Import your images into your photo editing software:
-
- Web-based: Canva, Pixlr, Photopea (all have free versions)
- Computer: GIMP (free), Adobe Lightroom, Photoshop Express
- Smartphone: Snapseed, Adobe Lightroom Mobile, VSCO (all have free versions)
Next, do these editing tasks:
-
- Crop and straighten if needed
- Adjust exposure (brightness/contrast)
- Correct white balance for accurate colors
- Remove the background or make it pure white
- Make final adjustments to sharpness and clarity
- Resize for web use (typically 1000-2000px on the longest side)
- Save as JPG (for white backgrounds) or PNG (for transparent backgrounds.
If you are planning to shoot a lot of products or add video into the mix, it helps to stay organized from the start.
Use production management software like Pzaz. It lets you keep your schedule, assets, and edits in one place. With features like shot lists and drag-and-drop scheduling, you stay focused and never miss a shot.
Step 7: Optimize Product Photos for Web Use
Your photos might look amazing, but if they load slowly or do not show up in searches, you are losing sales before anyone sees them. This is where image optimization comes in.
It is more than just a tech task; it is how you make sure your visuals support your marketing. When you optimize images right after post-production, they load fast, rank better, and look sharp across all devices.
-
What To Do
- Compress your files using free tools like TinyPNG or Squoosh to reduce file size without losing quality.
- Avoid special characters or spaces in file names. Stick to dashes or underscores.
- Rename your files with keywords (e.g., “leather-wallet-brown.jpg”) to help with SEO.
- Test your page speed (web and mobile) using PageSpeed Insights to make sure your image optimization efforts are working.
- Add alt-text that clearly describes the product to make it more accessible for search engines.
- Resize your images to around 1000–2000px on the longest side; big enough to zoom, small enough to load fast.
To stay on top of all this, bring in an SEO agency that knows how to keep your website fast, searchable, and fully optimized. They can make sure your photos are consistently optimized across every page so your images always load fast, look sharp, and support your rankings.
DIY Product Photography Best Practices
Look through these ideas to spot which habit will make your DIY setup more organized, your photos more interactive, or your workflow easier to manage.