Awe-inspiring landscapes, bustling markets, and candid moments with locals—travel videos capture the essence of adventure. But raw footage alone rarely does justice to the experience.
Editing is where the magic happens: it transforms clips into a cohesive story evokes emotion, and keeps viewers glued to the screen.
As a professional travel filmmaker for over a decade, I’ve learned that editing is not just about cutting clips—it’s about crafting a narrative.
In this guide, I’ll share my proven workflow, tools, and creative techniques to help you edit travel videos like a pro.
In this article:
- Pre-Production Planning – The Foundation of Great Edits
- Organizing Travel Footage for Faster Editing
- Editing Techniques – Building Your Story
- Audio Enhancement – The Invisible Game-Changer
- Color Grading – From Flat to Cinematic
- Text and Graphics – Subtle but Impactful
- Pacing and Rhythm – Keeps Viewers Hooked
- Exporting Travel Videos: Best Settings for YouTube, Instagram, & More
Source: Freepik
Pre-Production Planning – The Foundation of Great Edits
Great editing starts before you hit "record." Here’s how to set yourself up for success:
1. Define Your Story
Every travel video needs a narrative arc. Ask yourself:
- What’s the purpose? Is it a vlog, a cinematic montage, or a destination guide?
- What’s the emotional core? Joy, discovery, cultural immersion?
- Who’s the audience? Friends, social media followers, or clients?
Example: For a Bali travelogue, I structured the story around “A Solo Journey from Chaos to Calm,” contrasting Ubud’s serene rice terraces with Kuta’s nightlife.
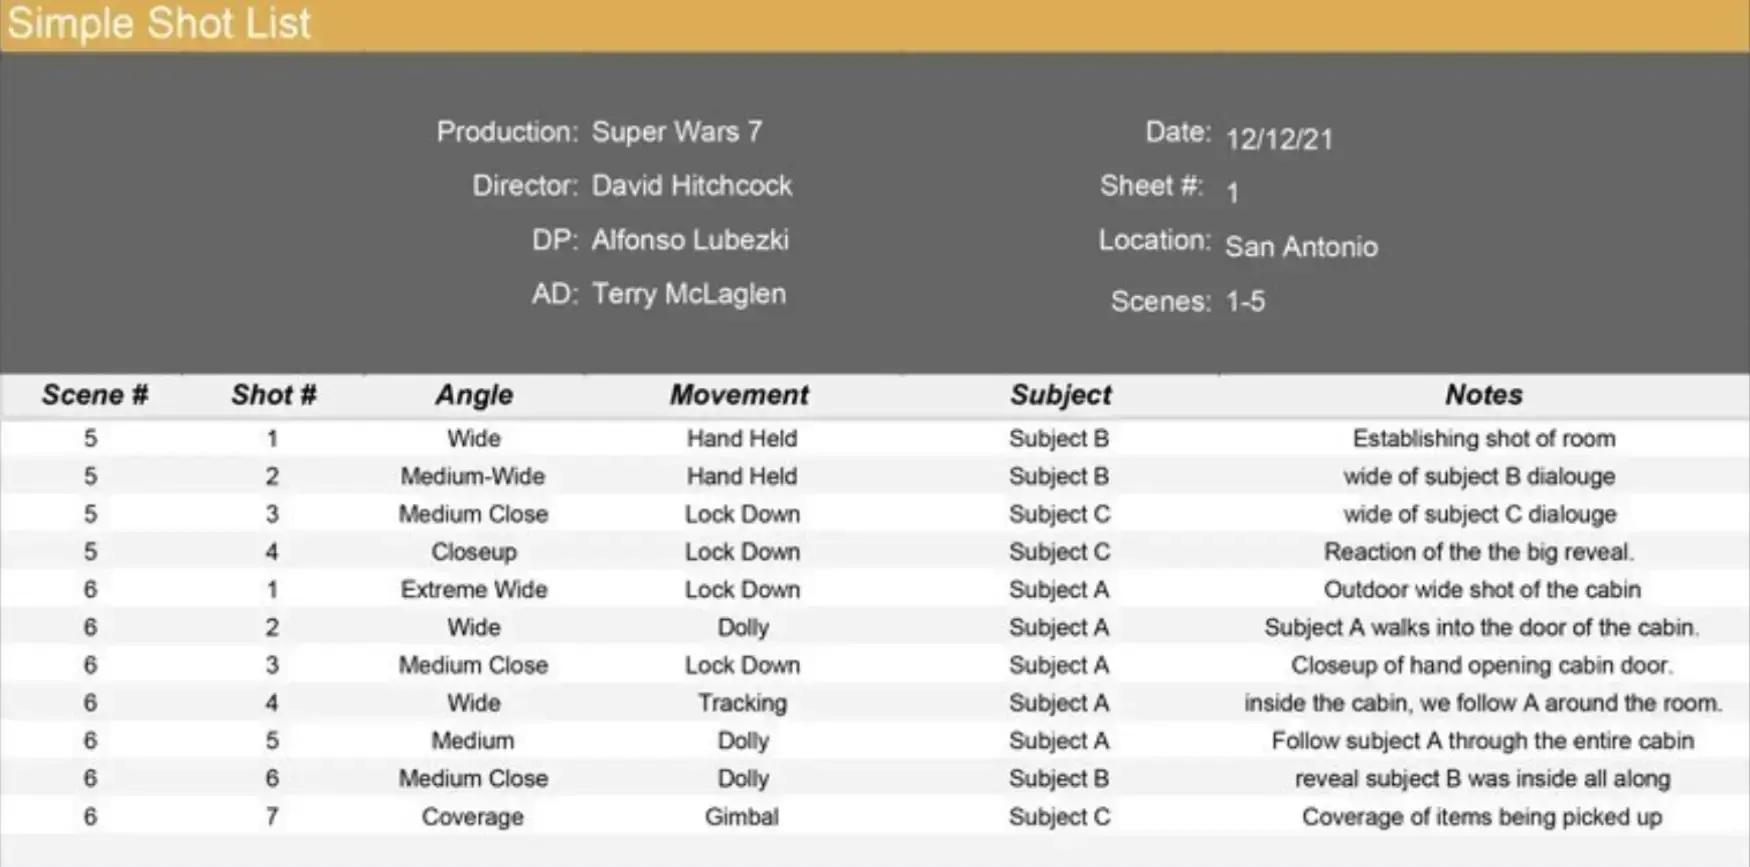
2. Create a Shot List
Plan specific shots to avoid coming home with 10 hours of unusable footage. Include:
- Establishing shots (e.g., drone footage of a city skyline).
- Action shots (e.g., hiking, cooking local food).
- Detail shots (e.g., hands weaving textiles, steam rising from street food).
- People and culture (e.g., interviews, laughter, daily rituals).
Pro Tip: Use apps like Shot Designer or Evernote to organize shot lists on the go.
3. Gear Up Smartly
Your equipment dictates your editing flexibility:
- Stabilization: Use gimbals (DJI OM 6) or shoot in 4K to crop shaky footage later.
- Audio: Pack a portable mic (Rode VideoMic Pro) for clear voice-overs.
- Drone: Capture aerial transitions (e.g., flying from ocean to forest).
Organizing Travel Footage for Faster Editing
A cluttered timeline is your worst enemy. Here’s how to stay organized:
1. File Management
- Folder Structure: Create folders by date/location (e.g., “2023_Japan_Day1_Tokyo”).
- Naming Conventions: Use descriptive names like “Tokyo_Shibuya_Crossing_WideShot.”
- Backup: Always duplicate footage to an external SSD and cloud storage (Dropbox, Google Drive).
2. Cull Ruthlessly
Delete or flag unusable clips immediately:
- Blurry shots, accidental recordings, or duplicates.
- Clips with harsh shadows or overexposed skies (unless salvageable in post).
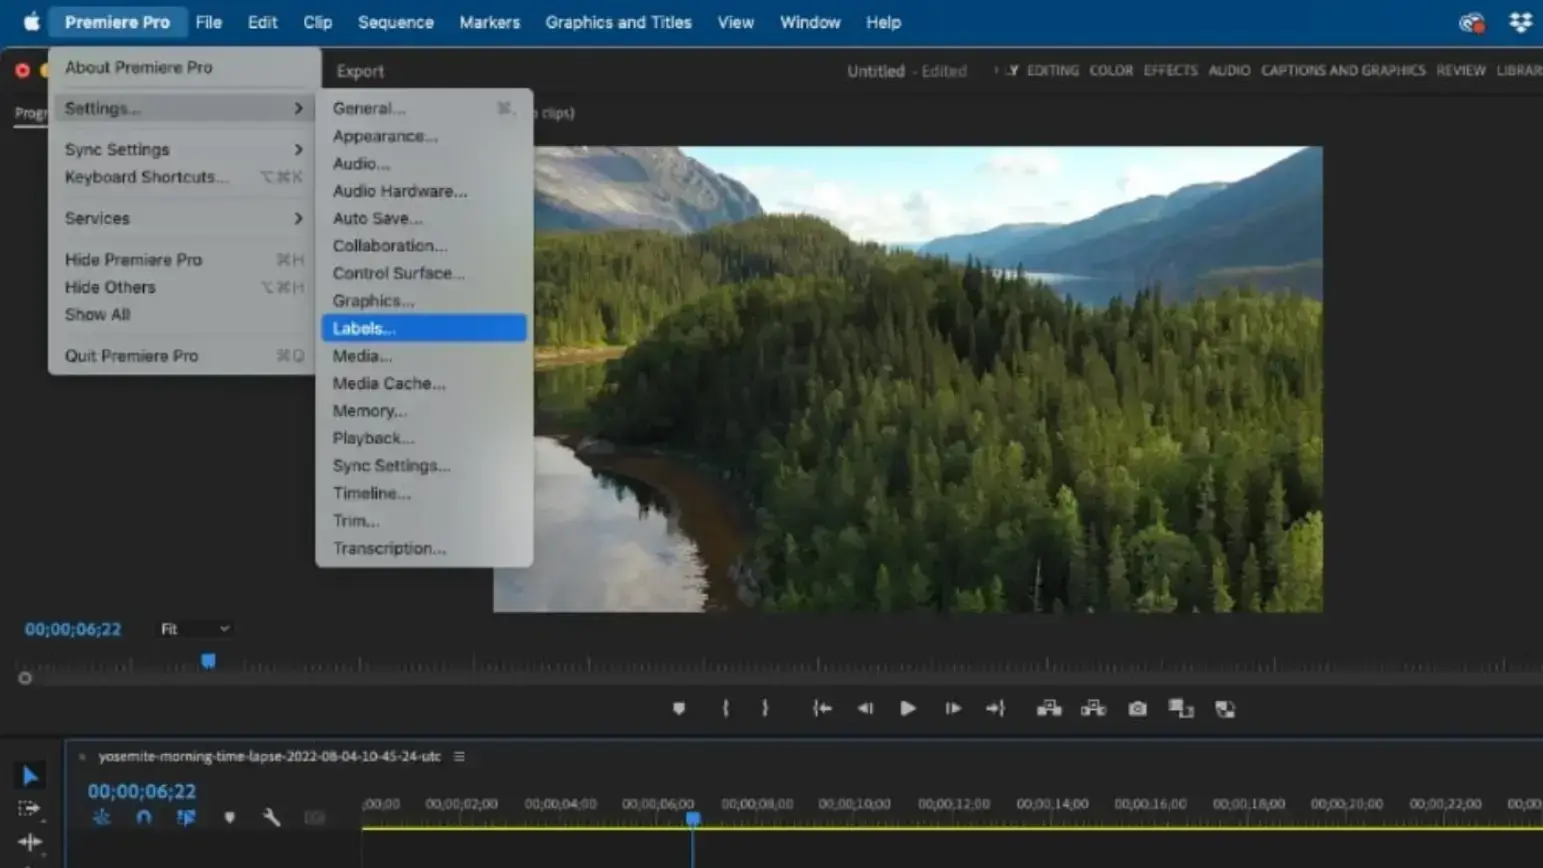
Pro Tip: Use Adobe Premiere Pro’s “Label” feature to color-code clips (Green = Best Takes, Red = Trash).
3. Sync Audio and Video
If using external mics, sync audio early:
- Use clapperboard sounds or hand claps as reference points.
- Tools like PluralEyes or Premiere Pro’s “Merge Clips” automate syncing.
Editing Techniques – Building Your Story
Now, the fun begins. Let’s dive into the edit.
1. Professional Software for Video Editing
If you want to create high-quality travel videos, professional video editing software offers powerful tools to refine your footage. Here are some top choices:
- Adobe Premiere Pro – Industry-standard software with advanced features like multi-cam editing, motion graphics, and color grading.
- Final Cut Pro – A great option for Mac users, known for its smooth workflow and high-end tools.
- DaVinci Resolve – Ideal for professional color correction and grading, used by filmmakers worldwide.
- HitFilm Express – Offers a mix of video editing and visual effects, perfect for those who want cinematic effects.
These software solutions provide complete control over your edits, making them suitable for professionals and those looking to level up their editing skills.
2. Video Editing Apps for Mobile
For quick, on-the-go video editing, mobile video editing apps offer powerful features in a user-friendly format. Some great options include:
- CapCut – A free and easy-to-use app with auto-captions, transitions, and music sync options.
- InShot – Ideal for simple edits, allowing you to trim, add effects, and adjust speed effortlessly.
- VN Video Editor – A great option for adding cinematic effects, filters, and transitions.
- LumaFusion – A premium app for iOS users, offering professional-level features similar to desktop software.
- YouCam Video – Enhance clips with AI tools, add filters, music, and text, and create polished, engaging videos right from your phone.
These apps allow you to edit and share travel videos instantly, making them perfect for vloggers and travelers who want to upload content on the fly.
3. Start with a Rough Cut
Import your best clips and assemble them chronologically or thematically. Focus on:
- Pacing: Alternate between fast-paced action and slow, reflective moments.
- Transitions: Use cuts, not cheesy effects. Save transitions like whip pans or match cuts for key moments.
Example: In a Moroccan video, match a spinning pottery wheel to a rotating shot of a desert sunset.
4. Stabilize and Reframe
Fix shaky footage:
- Warp Stabilizer (Premiere Pro): Smooth out handheld shots.
- Zoom/Crop: Reframe 4K footage to remove distractions (e.g., tourists in the background).
5. Add B-roll Strategically
Layer B-roll over narration or music to add depth:
- Detail Shots: Close-ups of food, textures, or street signs.
- Reaction Shots: Your face lighting up at a stunning view.
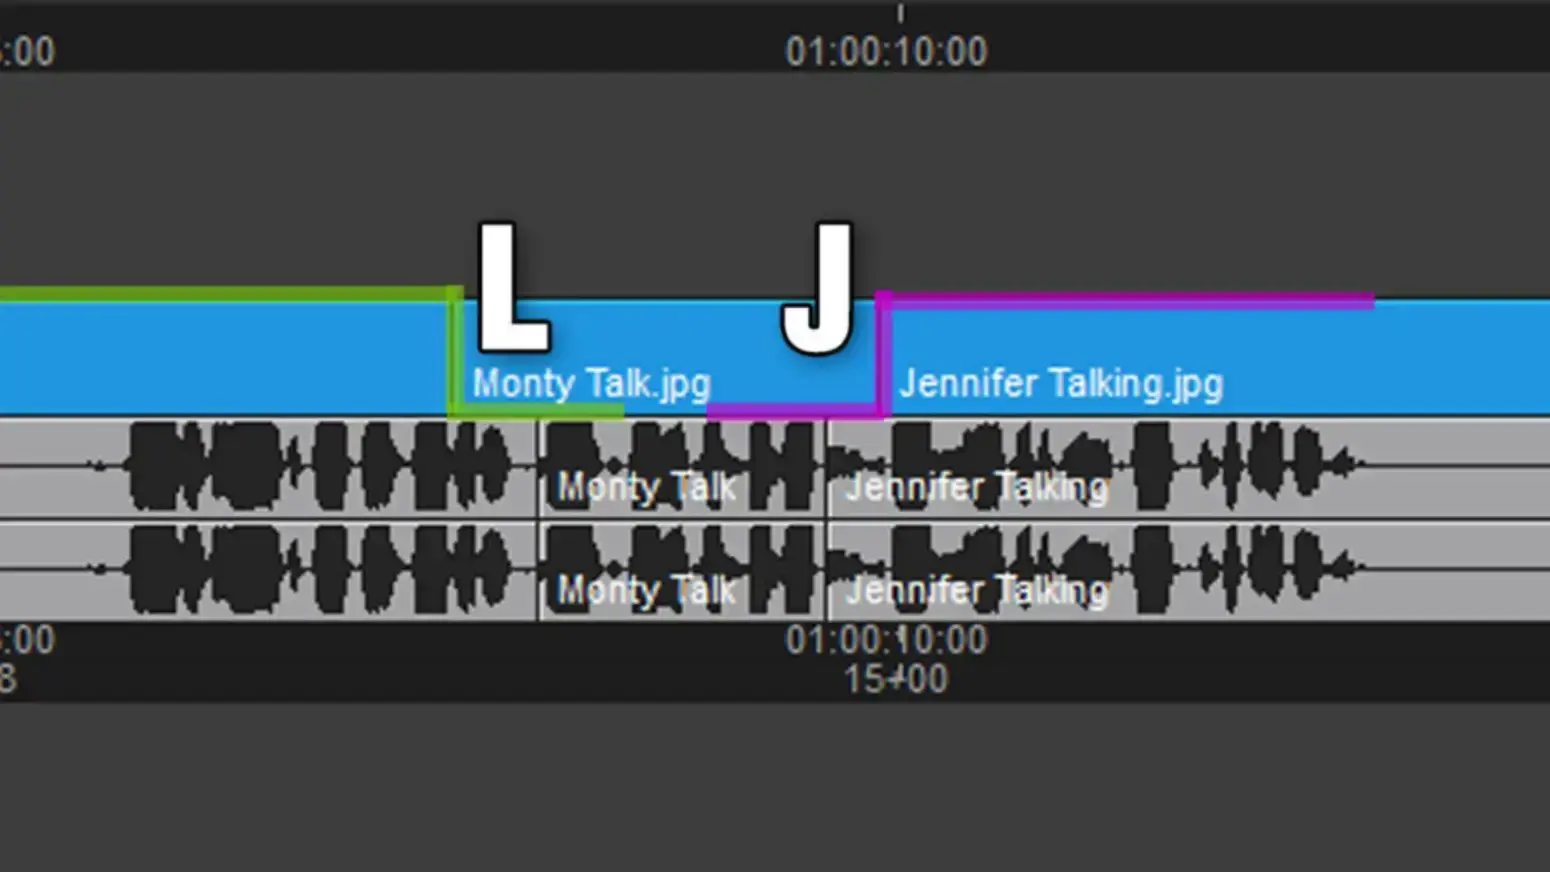
Pro Tip: Use J-cuts (audio from the next scene starts before the video) for seamless transitions.
Audio Enhancement – The Invisible Game-Changer
Viewers forgive imperfect visuals but never bad audio.
1. Clean Up Dialogue
- Reduce Noise: Use Audacity’s Noise Reduction or Premiere’s Essential Sound panel.
- Levels: Keep voiceovers at -6dB and background music at -18dB to avoid clipping.
2. Add Music and Sound Effects
- Royalty-Free Tracks: Use Artlist, Epidemic Sound, or YouTube Audio Library.
- Match Music to Mood: Upbeat tracks for city tours, ambient sounds (waves, birds) for nature scenes.
- Sound Effects: Enhance immersion (e.g., market chatter, footsteps on gravel).
Example: For a Nepal trekking video, layer wind sounds under a melancholic piano track to emphasize isolation.
Color Grading – From Flat to Cinematic
Color grading elevates your video from amateur to professional.
1. Correct First, Style Later
- White Balance: Fix orange indoor lighting or blue-tinted landscapes.
- Exposure: Use scopes to avoid crushed blacks or blown-out highlights.
2. Apply LUTs (Look-Up Tables)
LUTs are color presets that emulate film stocks or moods:
- Free LUTs: Try Kodak Vision3 or ARRI LogC.
- Custom Tweaks: Adjust saturation, contrast, and shadows after applying LUTs.
Pro Tip: For tropical destinations, boost greens and teals to make forests and oceans pop.
Text and Graphics – Subtle but Impactful
Avoid clutter. Use text to:
- Introduce Locations: Minimal lower-thirds (e.g., “Kyoto, Japan”).
- Add Context: Brief captions explaining cultural nuances.
- Animate Sparingly: Simple fade-ins, not spinning 3D text.
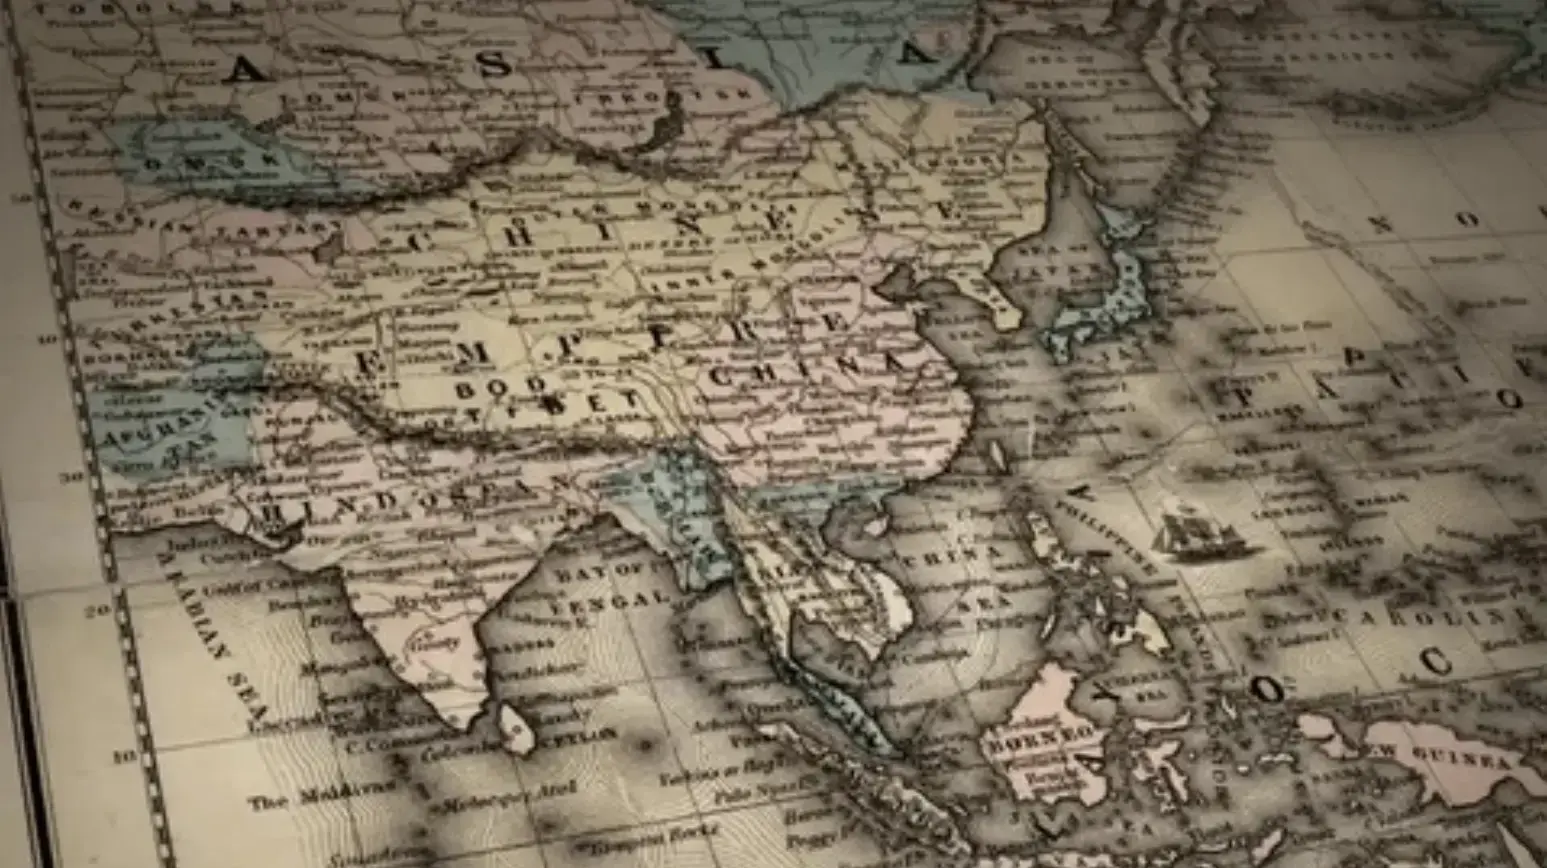
Example: In an India video, I used a vintage map animation to trace my route from Delhi to Jaipur.
Pacing and Rhythm – Keep Viewers Hooked
Aim for variety:
- Fast Cuts: Action sequences (e.g., surfing, dancing).
- Slow Motion: Highlight details (e.g., a coffee pour, a child’s smile).
- Silence: Let powerful moments breathe (e.g., a mountain summit reveal).
Pro Mistake to Avoid: Don’t linger on a single clip for more than 5 seconds unless it’s truly captivating.
Exporting Travel Videos: Best Settings for YouTube, Instagram, & More
Optimize settings for your platform:
- YouTube/Vimeo: H.264, 4K (3840x2160), Bitrate 50-100 Mbps.
- Instagram Reels: 1080x1920, 30-60 fps.
- Check Aspect Ratios: 16:9 for YouTube, 9:16 for TikTok.
Conclusion
Editing travel videos is an art of balance—between storytelling and technicality, creativity and restraint.
Remember, even pros make multiple drafts. Walk away from your edit, revisit it with fresh eyes, and trim relentlessly.
Your goal? To make viewers feel the wanderlust you experienced. Now, fire up your editor, and let the world see your adventure through your eyes.
Frequently Asked Questions (FAQs) on Travel Video Editing
1. What’s the best video editing software for beginners?
For new editors, CapCut (free, mobile-friendly) or iMovie (Mac/iOS) are ideal for basic cuts, transitions, and music syncing. As you advance, transition to Adobe Premiere Pro or Final Cut Pro for granular control over color grading, audio mixing, and effects.
2. How do I fix shaky footage without a gimbal?
Use in-camera stabilization (if available) or post-production tools like:
- Warp Stabilizer (Adobe Premiere Pro)
- Stabilization (DaVinci Resolve)
- HyperSmooth (GoPro footage).
Shoot in 4K to allow cropping and reframing shaky clips.
3. How long should a travel video be?
It depends on the platform:
- Social media (Instagram/TikTok): 15–60 seconds for reels.
- YouTube/Vlogs: 5–10 minutes for engagement.
- Cinematic films: 3–5 minutes for festivals or portfolios.
Always prioritize pacing—cut anything that doesn’t serve the story.
4. How do I make my video “cinematic”?
- Frame rate: Shoot in 24fps for a filmic look.
- Color grading: Use LUTs to emulate movie tones (e.g., teal and orange for landscapes).
- Aspect ratio: Add black bars (2.35:1) for a widescreen feel.
- Slow motion: Use 60fps or 120fps for dramatic moments.
5. What’s the #1 mistake to avoid in travel video editing?
Overusing transitions. Stick to simple cuts for 90% of your edits. Save flashy transitions (zooms, spins) for key moments, like moving between locations or time jumps.
6. How do I sync audio from a separate microphone?
- Clap sync: Record a clap at the start of a take to visually align audio waveforms.
- Auto-sync tools: Use PluralEyes or Premiere Pro’s “Merge Clips” feature.
- Manual adjustment: Drag audio tracks to match lip movements or action sounds.
7. How can I find royalty-free music that matches my video’s mood?
Use platforms like:
- Artlist or Epidemic Sound (paid, high-quality).
- YouTube Audio Library (free, filter by genre/mood).
- FreeSound.org (for ambient effects like waves or crowd noise).
Always check licensing terms for commercial use.
8. Why does my color grading look unnatural?
- Overuse of presets: Apply LUTs at 30–50% opacity and tweak manually.
- Mismatched white balance: Correct temperature before grading (e.g., fix orange indoor lighting).
- Over-saturation: Avoid neon skies—use the vectorscope to keep colors within broadcast-safe ranges.
9. How do I organize 100+ clips efficiently?
- Folder hierarchy: Sort by date/location (e.g., “Japan_Osaka_Day2”).
- Keyword tagging: Use metadata tags like “drone,” “B-roll,” or “interviews.”
- Selects reel: Create a “Best Clips” bin to store top-tier footage for quick access.
10. What’s the best way to add text without distracting viewers?
- Minimal lower-thirds: Use clean fonts (Helvetica, Roboto) and subtle animations (fade-ins).
- Contextual placement: Add location names in corners, not center-screen.
- Avoid clutter: Limit text to essential info (e.g., “Havana, Cuba” or “Local Guide: Maria”).

Author Bio
Saurav Singh | @_tasveerofficial
Photographer • Videographer
With 5+ years behind the lens, I blend cinematic storytelling with raw, unfiltered moments to make you feel the dust of roads and the pulse of bustling bazaars.

